Recipes

RECIPE: Chicken Fajita Pizza

Chicken Fajita Pizza (6 servings)

  • 3/4 pound boneless skinless chicken breasts, cut into 1/2-inch strips
  • 1 medium onion, halved and thinly sliced
  • 1 medium green pepper, julienned
  • 2 tablespoons olive oil
  • 2 teaspoons chili powder
  • 1/2 teaspoon garlic powder
  • 1 prebaked 12-inch pizza crust
  • 1/2 cup picante sauce
  • 2 cups (8 ounces) shredded Monterey Jack cheese

Directions

  1. In a large skillet, saute the chicken, onion and green pepper in oil until chicken juices run clear; drain. Sprinkle with chili powder and garlic powder.
  2. Place crust on an ungreased 12-in. pizza pan. Spoon chicken mixture over crust. Top with picante sauce; sprinkle with cheese. Bake at 450° for 10-12 minutes or until cheese is melted. Yield: 6 slices.

Recipe Source: Taste of Home

photo (16)

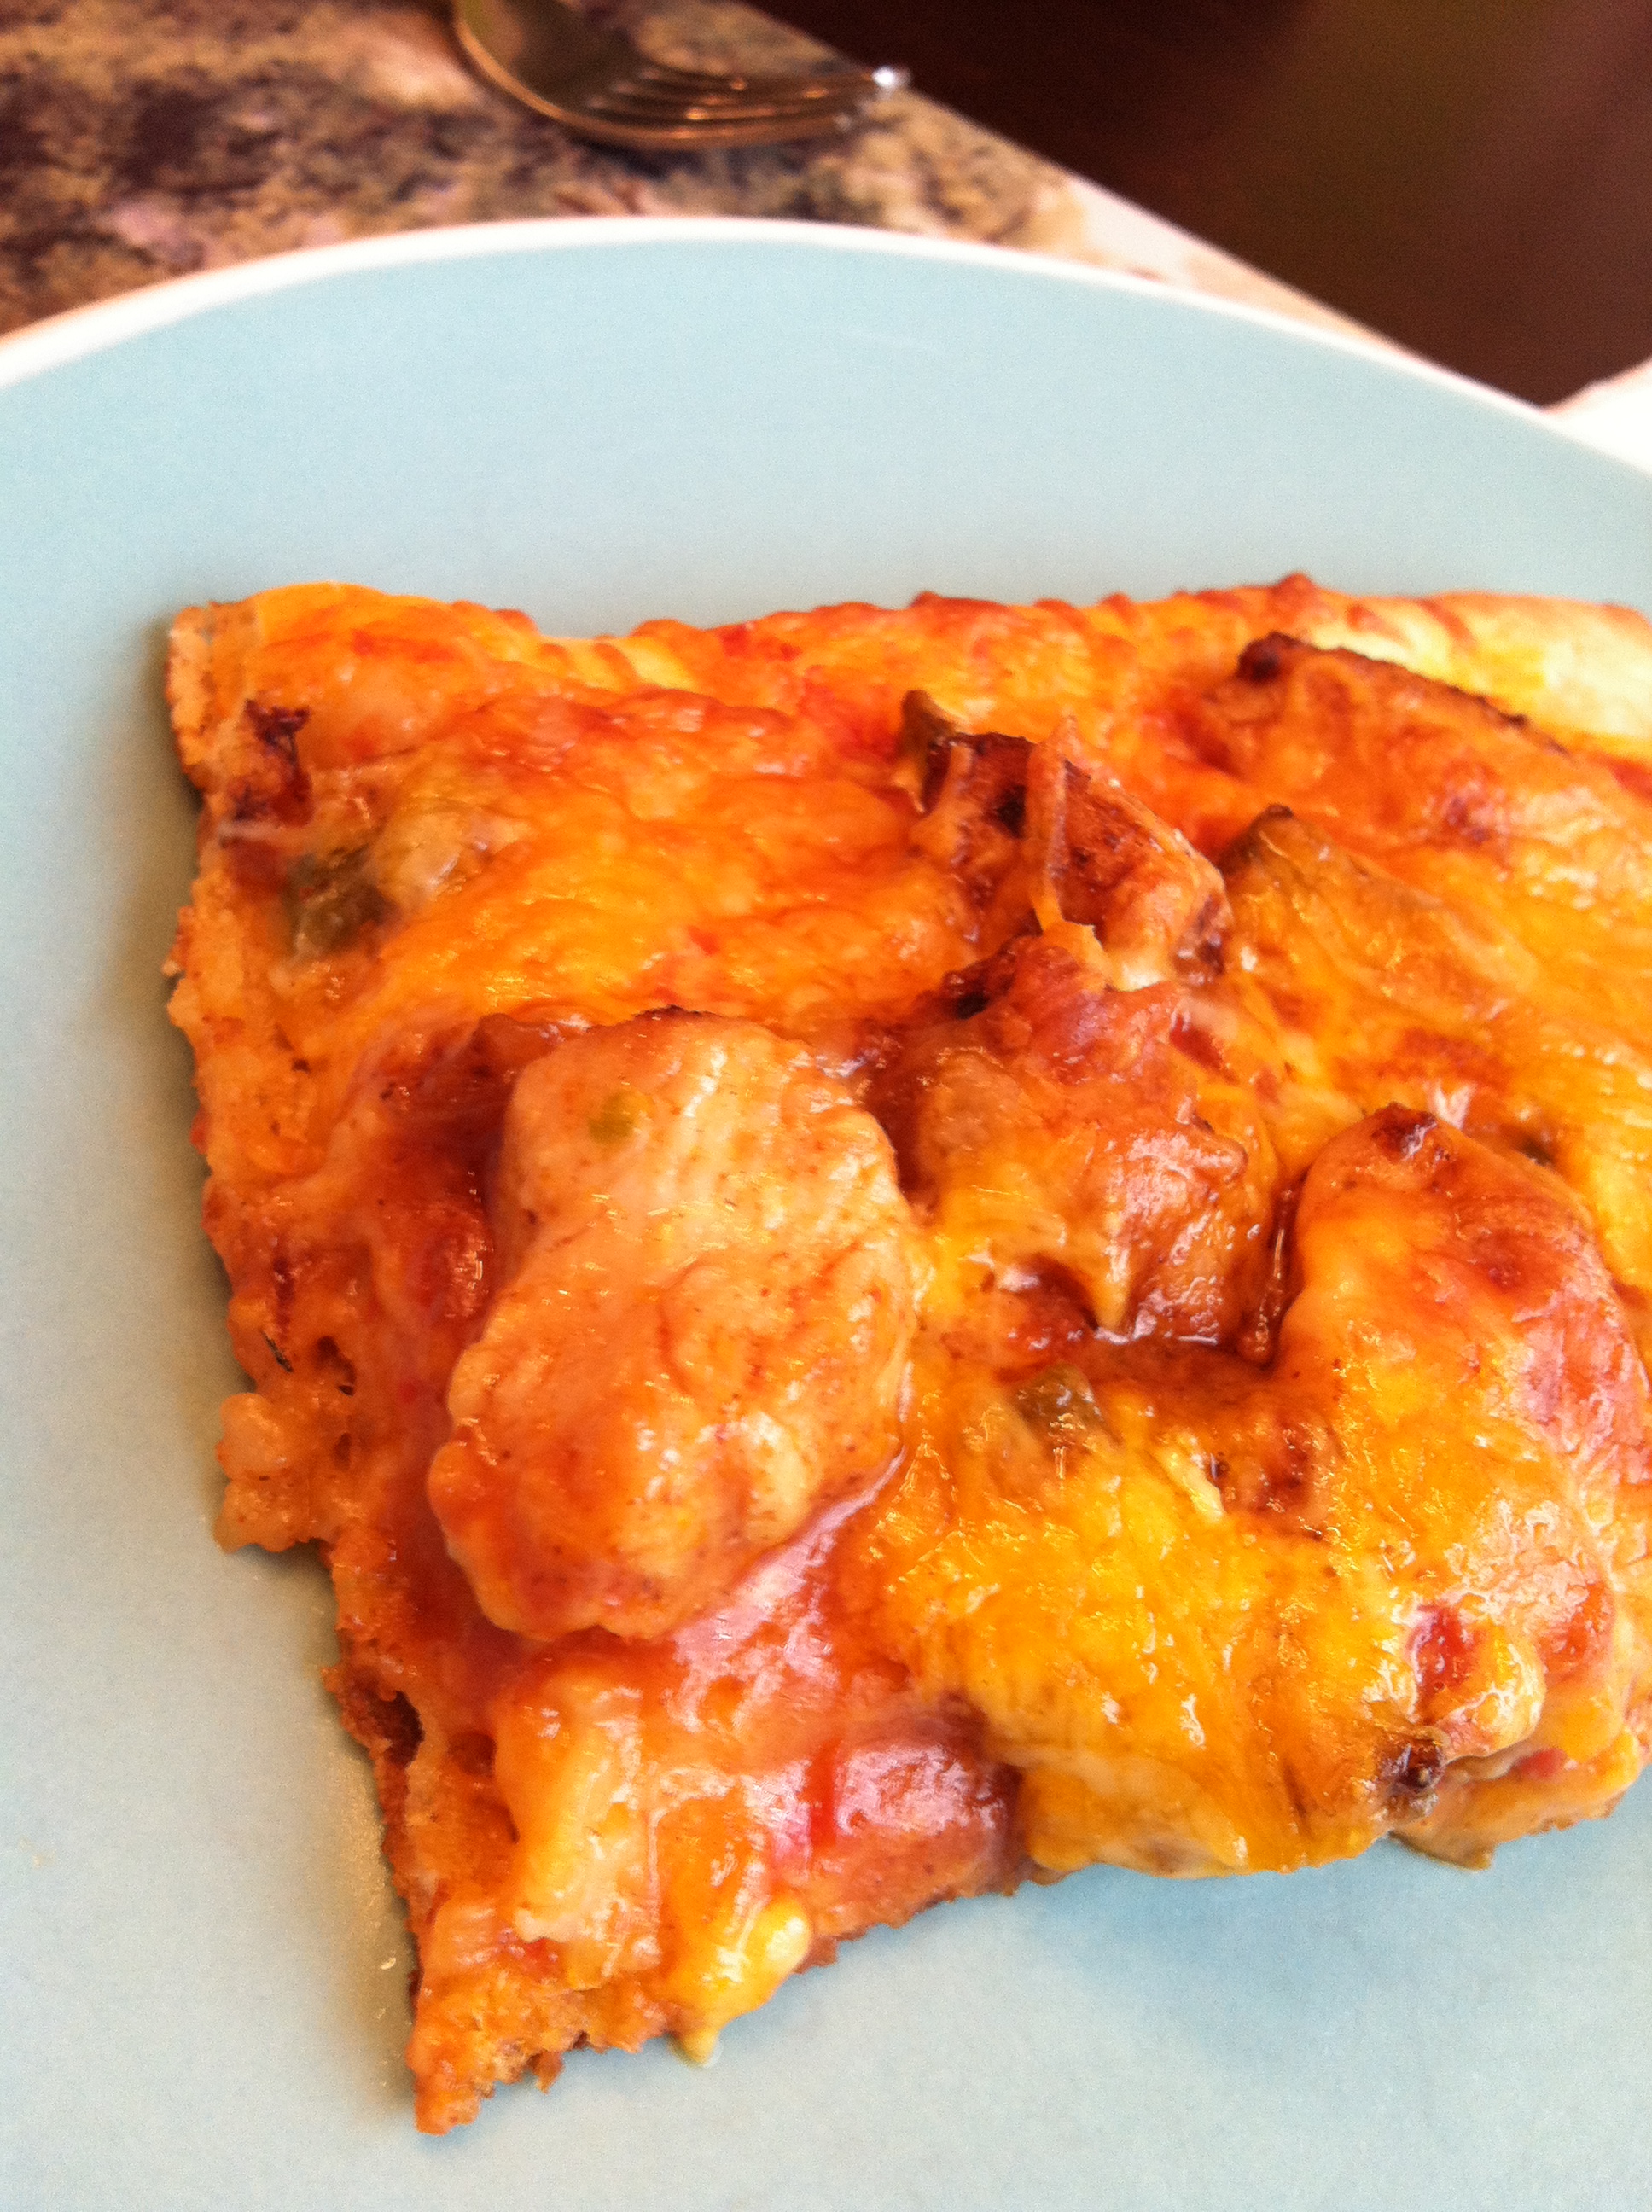
Personal Review: Deciding to make this pizza was kind of a spontaneous thing. I was planning on making a normal pepperoni pizza, but my husband had spotted this recipe in my notebook and suggested it instead of the old standby.

I have to admit, it wasn’t my favorite, but it wasn’t bad either. There was just something about it. I think my problem is that I’m not very adventurous when it comes to my pizzas. But hubby thoroughly enjoyed it and I’m sure I will be making it again in the future.

One change I made was that I spread some of the picante sauce on the crust directly – like you would pizza sauce. I don’t think it was necessarily a change that would need to be made, but one that I preferred.

Bottom Line: If you want to step outside of the pepperoni & cheese pizza, give this one a shot. It’s not too weird (apples & pineapples? I still don’t understand that combination) and yet it’s definitely outside the norm.

Recipes

RECIPE: White Chili

White Chili (2 servings)

  • 1/4 cup chopped onion
  • 1/4 cup chopped green pepper
  • 1 tablespoon olive oil
  • 1 can (15-1/2 ounces) great northern beans, rinsed and drained
  • 1 can (10-3/4 ounces) condensed cream of chicken soup, undiluted
  • 2/3 cup 2% milk
  • 2 tablespoons canned chopped green chilies
  • 1 garlic clove, minced
  • 1/2 teaspoon ground cumin
  • 1 cup diced cooked chicken breast
  • Shredded Monterey Jack cheese and sliced jalapeno peppers, optional

Directions

  1. In a large saucepan, saute onion and green pepper in oil until tender. Stir in the beans, soup, milk, chilies, garlic and cumin. Bring to a boil. Reduce heat; simmer, uncovered, for 30 minutes. Stir in chicken; heat through. Garnish with cheese and jalapenos if desired.

Recipe Source: Taste of Home

Personal Review: I first fell in love with white chili a few years back when I had some at Ruby Tuesday. Sadly, our local Ruby Tuesday closed years ago. So I knew I wouldn’t be getting my chili very often anymore (the closest Ruby Tuesday we have is almost 2 hours away). I decided to go in search of a white chili recipe of my own. This is actually the second recipe for white chili that I have tried.

The recipe itself needs some tweaking, but it makes a very good meal. First, I omit the green pepper (hubby isn’t too fond of green peppers so I keep them at a minimum). Second, I added 1 teaspoon of cumin. I added an entire can of the chopped green chilies. Also, I would recommend more than 1 can of beans – they seem to get lost in there if you don’t have more than that. If you like spicy (like we do – the spicier the better in our house), I would recommend cooking the jalapenos in the soup.

I like this recipe because it’s quick and easy. But as you can see, I personalize it to our tastes. This might not be the perfect recipe for everyone, and there are tons of recipes out there for white chili – but it’s a good place to start for you to find out your preferences.

Recipes

RECIPE: Green Chile & Pepper Jack Cheese Stuffed Chicken

Green Chile & Pepper Jack Cheese Stuffed Chicken (2 servings)

  • 2 teaspoons oil
  • 2 chicken breasts
  • 4 whole canned green chiles
  • 4 slices pepper jack cheese
  • Salt & pepper, to taste
  • Garlic Powder, to taste

Directions

  1. Preheat the oven to 400.
  2. Cut a horizontal slit along the center of the thin long edge of the chicken breast, nearly through to the other side. Roll the cheese into a tube and place into the whole green chile. Place the green chile into the chicken breast. Close the slit together with toothpicks. Season each sie of the chicken with the salt, pepper and garlic powder to taste.
  3. Heat the oil in an oven proof skillet over medium high heat. Once hot, place the chicken in the skillet and cook 3-4 minutes or until golden brown. Flip the chicken and place the skillet into the oven. Cook for 20 minutes or until the chicken is cooked through. Let the chicken rest 5 minutes before slicing.

Recipe Source: For the Love of Cooking

Personal Review: Such another great recipe, in my opinion! I am not very good at stuffing everything properly, but it still makes a very good recipe. You don’t necessarily have to have the oven proof skillet; the first time I made this I didn’t even own one and I just transferred it to a square baking dish and it still turned out very good. Sometimes when I make this I season it with some seasoned salt instead of regular salt. I usually add a little bit more cheese because we love cheese in this house. And if you follow the above link to the original source of this recipe, you will see how pretty everything comes out for her – yeah, it so does not look like that when I make it. The cheese melts everywhere and is just an overall mess. Haha. I also do not slice it, I just serve the chicken breasts intact.

Overall a quick weeknight meal that is quite yummy 🙂

Recipes

RECIPE: Garlic Cheddar Chicken

Garlic Cheddar Chicken (4 servings)

  • 1/2 cup butter
  • 4 garlic cloves, minced
  • 3/4 cup dry bread crumbs
  • 1/2 cup parmesan cheese
  • 1 1/2 cups cheddar cheese
  • 1/4 teaspoon parsley
  • 1/4 teaspoon oregano
  • 1/4 teaspoon pepper
  • 1/8 teaspoon salt
  • 1 lb chicken breasts

Directions

  1. Preheat oven to 350 degrees F.
  2. Melt the butter in a saucepan over low heat, and cook the garlic until tender, about 5 minutes.
  3. In a shallow bowl, mix the bread crumbs, Parmesan cheese, Cheddar cheese, parsley, oregano, pepper, and salt.
  4. Dip each chicken breast in the garlic butter to coat, then press into the bread crumb mixture. Arrange the coated chicken breasts in a 9×13 inch baking dish. Drizzle with any remaining butter and top with any remaining bread crumb mixture.
  5. Bake 30 minutes in the preheated oven, or until chicken is no longer pink and juices run clear.

Recipe Source: Allrecipes.com

Personal Review: This recipe is a favorite in our house! It’s sooo easy and delicious. I always add a little more garlic than the recipe calls for (we are big garlic fans) and I really just eyeball the cheddar cheese (which we love too, haha!). I almost always have to cook the chicken for longer than the recipe calls for – I don’t know if it’s my oven or if I just have really thicken chicken breasts, but I almost always have to cook the chicken for at least 40-45 minutes. I serve this with some au gratin or scalloped potatoes and some kind of green veggie or salad. I hope this one appeals to you and you enjoy it as much as we do 🙂

Recipes

RECIPE: Three Cheese Manicotti

Three Cheese Manicotti (5 servings)

  • 10 uncooked manicotti shells
  • 15 ounces ricotta cheese
  • 2 1/2 cups mozzarella cheese
  • 1/2 cup parmesan cheese
  • 1 egg, beaten
  • 1 teaspoon basil
  • 1 teaspoon oregano
  • 1/2 teaspoon onion powder
  • 1/2 teaspoon garlic powder
  • 1/2 teaspoon seasoned salt
  • 26 ounces spaghetti sauce

Directions

  1. Cook manicotti according to package directions. Meanwhile, in a bowl, combine the ricotta cheese, 2 cups mozzarella cheese, Parmesan cheese, eggs and seasonings. Spread 1 cup spaghetti sauce each in an ungreased 9×13″ baking dishes. Stuff manicotti shells with cheese mixture; arrange over sauce. Top with remaining sauce.
  2. Cover and bake at 375 degrees F for 35-40 minutes. Uncover; sprinkle with remaining mozzarella cheese. Bake 10 minutes longer or until cheese is melted and manicotti is heated through.

Recipe Source: Allrecipes.com

Personal Review: I’m going to be completely honest here – manicotti is not the easiest thing to make. It kind of rates up there with lasagna, in my opinion. Stuffing those shells is a pain in the rear. However, this recipe makes it all completely worth it. It’s delicious. Obviously since I’m not all that skilled at making this, I don’t make it very often – so it’s more of a treat when I do make it. I once read online somewhere that a big secret to stuffing the shells is to mix the stuffing mixture in a ziplock baggie and then cut a hole in one of the ends of the baggie and pipe it through (think icing a cake with a pastry bag) – definitely try this it sure makes things go a lot smoother! The recipe online calls for 15 minute prep time – if you’re as slow as I am, prepare to at least double that. (See why I don’t make this very often, haha!)

Bottom line: This is a delicious recipe that takes time to prepare but is well worth it in the end!

Recipes

RECIPE: Buffalo Chicken

Buffalo Chicken (4 servings)

  • 4 boneless skinless chicken breast halves
  • 1/4 teaspoon salt
  • 1/4 teaspoon pepper
  • 2 eggs
  • 1/2 cup seasoned bread crumbs
  • 3 tablespoons canola oil
  • 1/4 cup buffalo wing sauce
  • 1/4 cup shredded provolone cheese
  • 1/4 cup shredded part-skim mozzarella cheese

Directions:

  1. Flatten chicken to 1/2-in. thickness. Sprinkle with salt and pepper. In a shallow bowl, whisk eggs. Place bread crumbs in another shallow bowl. Dip chicken in eggs, then coat with bread crumbs.
  2. In a large skillet over medium heat, cook chicken in oil for 7-10 minutes on each side or until chicken juices run clear, adding wing sauce during the last 2 minutes. Turn to coat chicken. Sprinkle with cheeses. Cover and cook until cheese is melted.

Recipe Source: Taste of Home Simple & Delicious Magazine

Personal Review: This recipe was so easy and delicious! It comes together quickly for a good weeknight recipe. I served it with brussels sprouts. I am a huge fan of buffalo wings, so this recipe was perfect in my opinion. I can’t say anything negative about it. I might have added a tad too much cheese (if that’s even a possibility!) but it was definitely delicious either way. There are all kinds of different buffalo wing sauces out there and I personally used just traditional, but you could definitely play around with it for other tastes.

Highly recommended.

Recipes

RECIPE: Black Pepper Beef and Cabbage Stir Fry

Black Pepper Beef and Cabbage Stir Fry (4 servings)

  • 2 tablespoons vegetable oil
  • 4 cloves garlic, chopped
  • 1/2 pound ground beef
  • 1/2 small head cabbage, shredded
  • 1 red bell pepper, cut into strips
  • 2 tablespoons soy sauce
  • 1 teaspoon cornstarch
  • 1/2 cup water
  • 1 teaspoon ground black pepper

Directions

Heat a wok or large skillet over medium-high heat, and add oil. Saute garlic for about 5 seconds, then add ground beef. Stir-fry until beef is evenly brown. Stir in cabbage and pepper, and cook until vegetables are tender, and beef is fully cooked. Stir in soy sauce. Mix together cornstarch and water, and stir in. Season with pepper. Cook, stirring, until sauce has thickened.

Recipe Source: Allrecipes.com

Personal Review: I love cabbage and I love Chinese recipes so I thought this sounded like an awesome recipe. And it was – to an extent. I had an issue with the ground beef. I do not recommend using the regular ground beef (like I did); I would definitely recommend using a leaner cut of ground beef. Because of the meat I used it was a little greasy for my tastes. Other than that it was a good recipe, though. I think next time I will also add some onions to this recipe. I probably also used way too much soy sauce because it was a little on the salty side – but I didn’t measure out what the recipe called for, I just eyeballed it.

This review might sound negative, but it’s really not. I liked it, but it definitely needs some tweaking to make it a great recipe.

Recipes

RECIPE: Pizza Casserole

Squeee! I did it – I finally made a Pinterest recipe 🙂 … Pizza Casserole …. Woo-hoo! And it ended up being absolutely DELICIOUS!

For mamas is the original poster of this recipe and deserves amazing credit for such a great recipe! We LOVED it!

Pizza Casserole

  • 1 bag of Egg Noodles
  • 1 extra large can of Ragu sauce {or any sauce you prefer}
  • 3 cups shredded mozzarella cheese {or more depending on how much you ♥ cheese!}
  • 1 1/2 lbs hamburger meat
  • 1 package pepperonis

Directions

  1. Preheat the oven to 350. Boil the noodles per package instruction. Brown and drain the meat.
  2. Spread a thin layer of the sauce in the bottom of a 9×13″ pan. Add half of the noodles. Layer half of the meat. Half of the sauce. The remaining noodles. Half of the cheese. The remaining meat. The remaining sauce. And the remaining cheese.
  3. Add pepperonis to the top.
  4. Cover with foil and bake for 30 minutes. Remove foil and bake for another 15 minutes. Then let stand for 10-15 minutes.

Recipe Source: For mamas

Personal Review: Oh my goodness, I cannot say enough good things about this recipe. It was so delicious and easy to make. Here’s a few tweaks I made to it: first while I was browning the meat I added some garlic powder and red pepper flakes. I considered putting in some fresh garlic, but my garlic press was dirty and so I just went with the powder. Diced onions would probably be good to add as well. You definitely need to add some spice to the meat so it has a little bit of a pop of flavor 🙂 To ease things, definitely start the noodles and don’t start browning the meat until you first put the noodles in – it will be timed better that way. Also definitely let it sit for 10-15 minutes after you take it out of the oven. It was kind of like a lasagna, and it needed to sit so that it doesn’t all fall apart when you eat it.

Highly recommended 🙂

Recipes

RECIPE: Creole Shrimp Pasta

Time for me to share another recipe with you guys. It’s been a while since I had really made a new recipe, and this one technically isn’t “new” to us – I’ve made it a few times now. But it’s one I definitely enjoy.

Creole Shrimp Pasta (Makes 6 servings)

  • 1 package (16 ounces) penne pasta
  • 1 large red onion, finely chopped
  • 3 tablespoons butter
  • 3 tablespoons olive oil
  • 3 garlic cloves, minced
  • 1 pound uncooked large shrimp, peeled and deveined
  • 2 tablespoons seafood seasoning
  • 1/4 cup heavy whipping cream
  • 2 tablespoons lemon juice
  • 2 tablespoons Worcestershire sauce
  • 1 tablespoon Cajun seasoning
  • 1 tablespoon Louisiana-style hot sauce
  • 1/4 teaspoon pepper

Directions:

  1. Cook pasta according to package directions. Meanwhile, in a Dutch oven, saute onion in butter and oil until tender. Add garlic; cook 1 minute longer. Sprinkle shrimp with seafood seasoning; add to pan.
  2.    Stir in the cream, lemon juice, Worcestershire sauce, Cajun seasoning, hot sauce and pepper. Drain pasta, reserving 3/4 cup cooking liquid. Stir reserved cooking liquid into pan. Cook and stir for 6-8 minutes or until shrimp turn pink. Add pasta and toss to coat.

Recipe Source: Taste of Home Simple & Delicious Magazine

Personal Review: Okay, so by the picture this probably doesn’t look like much. But for some reason I thoroughly enjoy it. It’s easy to cook – but you definitely need to watch the timing of everything for this to go as smoothly as possible. Since shrimp doesn’t take that long to cook, I recommend putting the water on to boil before you chop up the onions just so that you aren’t standing around waiting for the pasta to finish cooking (like I was the first time I made this!). Also another thing that I found out the hard way – if you do not like a lot of spice do not under any circumstances use Habanero hot sauce! Yes, I did this the first time I made this (on accident – Nathan has a huge selection of hot sauces and I picked up the wrong one by mistake), and yes, I completely 100% regretted it – I think my mouth was on fire for two days. The next time I made this I used regular hot sauce and it came out much milder 🙂 I think our only complaint about this meal is that it doesn’t seem very filling. Of course I wasn’t all that prepared and didn’t have a salad or a side dish to go with this, so I think that if you served it with a salad and garlic bread it would make a much better meal.

Overall, I would definitely recommend this recipe. If you are afraid of the spice level, for sure play around with the amount of spice/hot sauce you use. It’s also very easy to make and comes together quickly for a weeknight meal.

Recipes

RECIPE: Blackened Chicken and Beans


Blackened Chicken and Beans (makes 4 servings)

  • 2 teaspoons chili powder
  • 1/4 teaspoon salt
  • 1/4 teaspoon pepper
  • 4 boneless skinless chicken breast halves
  • 1 tablespoon canola oil
  • 1 can black beans, rinsed and drained
  • 1 cup frozen corn
  • 1 cup chunky salsa

Directions:

  1. Combine the chili powder, salt and pepper; Rub over both sides of chicken. In a large, nonstick skillet, cook chicken in oil over medium heat for 4-5 minutes on each side or until a thermometer reads 170. Remove and keep warm.
  2. Add the beans, corn and salsa to the pan; heat through. Serve with chicken.

Recipe source: Taste of Home

Personal Review: I’ve been trying to try new recipes at least 1-2 times a week. This is a new one that I made last week. Unfortunately I forgot to take a picture for this post. I was surprised at how moist the chicken was. And the amount of spice was just perfect in my opinion. Actually I almost added a little more chili powder just because we like spicy things. I didn’t use chicken breast halves, I used hi chicken breasts so it took longer for me to get the chicken cooked through. I think next time I will cut the chicken breasts in half just for ease of cooking. The bean mixture was very easy and quite good. Beans aren’t my normal thing, but I did eat a little bit of it. I served this dish with steamed Brussels sprouts. Definitely an easy meal to make and scrumptious too! Highly recommended.